How to Make an AI Chatbot – No Code Required.
Learn how to make an AI chatbot with tools like Tidio. Bring the power of AI to your business or personal website. Throughout this article, you will learn the steps to creating a no-code chatbot step-by-step:
Step 1: Identify the purpose of your chatbot
Step 2: Decide where you want it to appear
Step 3: Choose the chatbot platform
Step 4: Design the chatbot conversation in a chatbot editor
Step 5: Test your chatbot
Step 6: Train your chatbot
Step 7: Collect feedback from users
Step 8: Monitor chatbot analytics to improve it
In addition, tips and guidelines for creating chatbots from scratch, and a chatbot-building FAQ.
Also Read: Automation in small steps.
Why should you make a chatbot for your website?
Conversational bots have become more than a fad, and makers of the bots tailor them specifically for specific purposes. For instance, chatbots can:
Make customers happy by answering their questions faster
Conduct multiple real-time conversations at once
Increase your sales by 67%
Make your website more interactive, engaging, and credible
Offer better user experiences on mobile devices
Can collect feedback with up to 90% of the response rate, or recover abandoned shopping carts
Help us explore the possibilities of conversational interfaces
E-Commerce stores, for example, require them. Chatbots can answer 69% of customer questions on their own. Reducing customer service costs by 30% is possible with chatbots.
Your own custom chatbot gives you:
Advanced automations based on any action on your website
Deeper integration with your technological stack
Personalized customer experiences for your audience
More control over conversation flows
It’s not surprising that there has been a 160% increase in client interest in implementing bots. But how do you create an AI chatbot?
Also Read: Self taught AI will be the end of us.
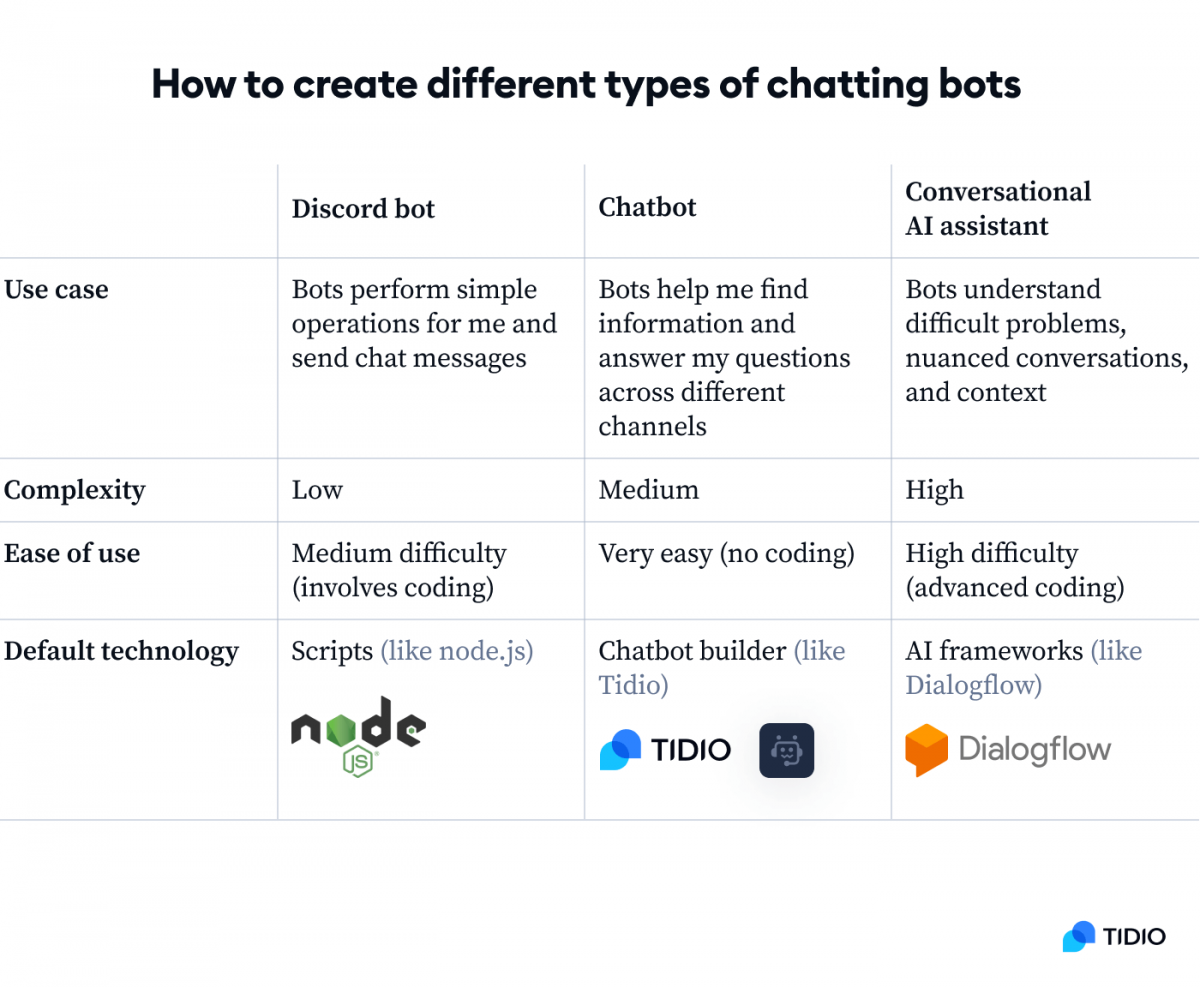
Source: Tidio
Tidio, for example, can use millions of real-life conversations to train their intent recognition systems. The creation of virtual assistants is much simpler with a dataset based on typical interactions between customers and businesses.
Now—
Let’s look at how to build a chatbot with a chatbot building platform and start the tutorial.
How to make a chatbot from scratch in 8 steps
Learn how to choose a chatbot provider and how to design a conversational flow with this eight-step tutorial.
Step 1: Give your chatbot a purpose
Establish what you want the chatbot to do. Being as specific as possible is a good idea.
In order to start, you can ask yourself a few questions:
For what purpose are you building the chatbot? Is it for customer service automation, improving the customer experience, or generating leads? Maybe it’s all of these?
How do your customers use your products most frequently? Think about some examples based on your queries.
Would a chatbot provide you with the main benefit you seek? Automated responses to questions? Having your questions forwarded to the right support team? Can you save abandoned carts and qualify leads?
Identifying the features and types of chatbot you need will be much easier once you know the answers.
Step 2: Decide where you want it to appear
What is your primary communication channel? Do you have a live chat solution on your website or do most of your customers contact you through social media?
To serve your customers where they are, check if the chatbot platform you choose is integrated with the tools you already use:
The website you have. A majority of chatbot building platforms integrate with popular website providers such as WordPress, Magento, and Shopify.
Facebook Messenger, Instagram, or Telegram are all social media channels you can use.
Additional messaging platforms and tools you may have in your stack (such as Slack).
Try configuring the integration yourself via a code snippet or open API, if possible.
There are many chat bot development platforms that offer multiple integrations, meaning chatbots can be used across multiple channels.
Step 3: Choose the chatbot platform
Having determined which chatbot variants you desire and which channels you wish to cover, the next step is choosing the provider.
You can choose between the framework and the platform.
Artificial intelligence frameworks. Platforms such as Google’s Dialogflow, IBM Watson, and Microsoft Bot are libraries that software developers use to build chatbots.
A chatbot platform. You can build a chatbot with building blocks using their easy-to-use chatbot builders. As a result, they are becoming increasingly popular because building bots with their help is much easier and less time-consuming while providing comparable results.
Step 4: Design the chatbot conversation in a chatbot editor
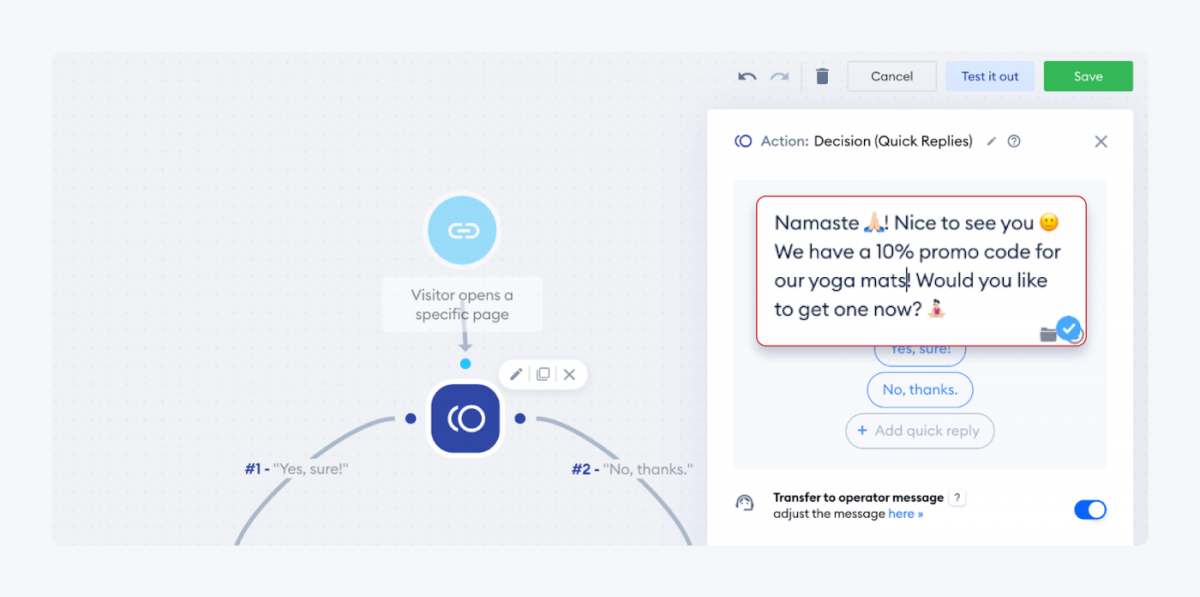
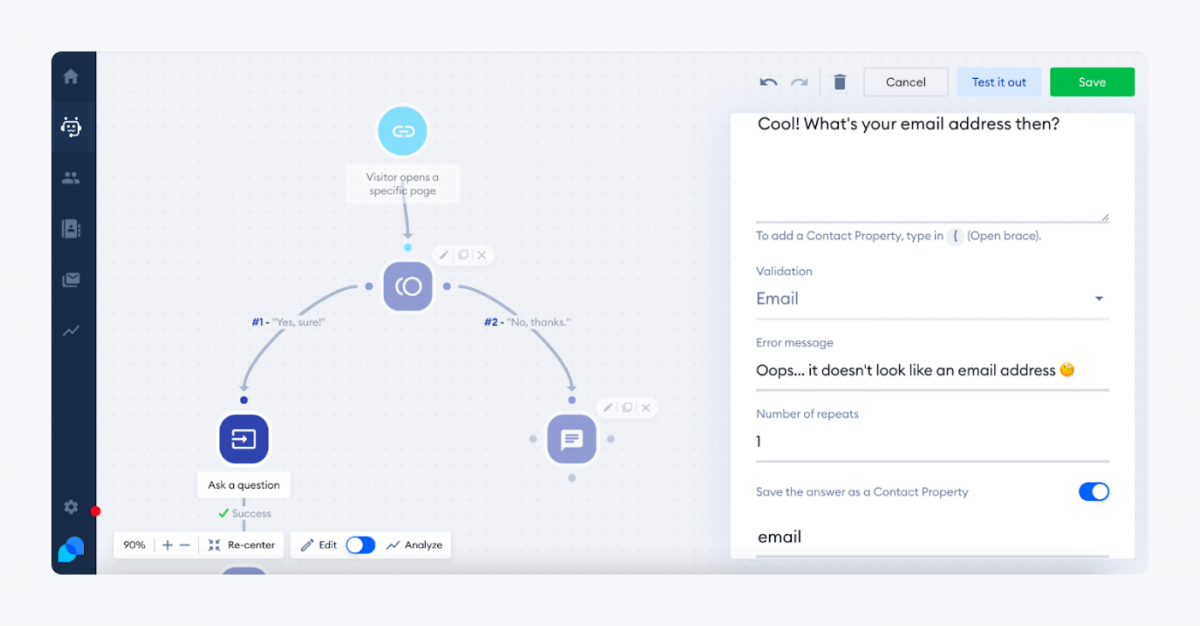
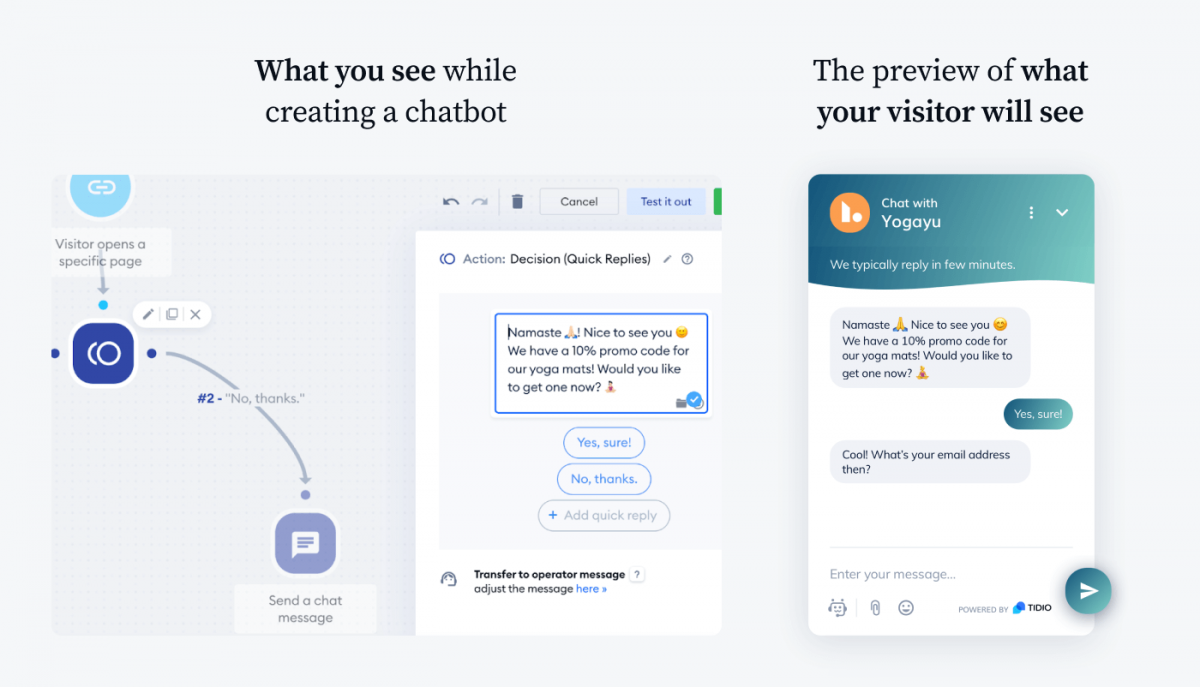
Building blocks can be dragged and dropped to create a sequence of the conversation flow. You want to offer a discount to users who enter a specific landing page in your yoga accessories shop in exchange for their email address.
Log in to the bot builder after you have logged in. The chatbot will send a welcome message when the trigger condition is met The chatbot will send a welcome message when the trigger condition is met . If you want the chatbot to appear on a specific landing page, start with a Visitor that opens a specific page node.
Next, enter the message you wish to send and add a decision node. Identify a discount message for those who want a discount and a discount message for those who don’t.
Source: Tidio
Source: Tidio
Step 5: Test your chatbot
Now it’s time to test if everything works as it should. To do that, click the Test it out button. A window will appear that will show you what the chatbot would look like for the end-user. Thanks to the preview, you can always come back to the editor and correct the flow.
Source: Tidio
Step 6: Train your chatbots
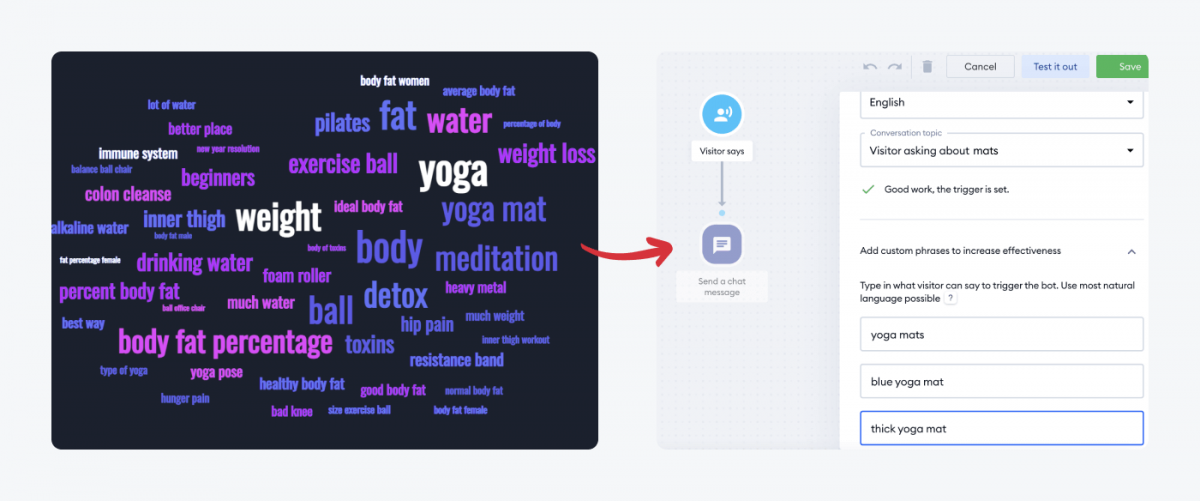
If you want to use simple chatbots based on decision tree flows, you can skip this step. If you want your bot to understand the user’s intent, you need to add an NLP trigger to your chatbot.
At Tidio, we have a Visitor says node that uses predefined data sets such as words, phrases, and questions to recognize the query and act upon it.
To train the bot, analyze your customer conversations, and find the most popular queries and frequent issues. You can do it manually, or use a word cloud generator like Free Word Generator. Then, add the words, phrases, and questions related to a chosen subject (like shipping) to the Visitor says node.
This way, you will “feed” the NLP engine, so the chatbot will recognize similar queries that can appear in future conversations. The more phrases you add, the better!
Source: Tidio
Step 7: Collect feedback from users
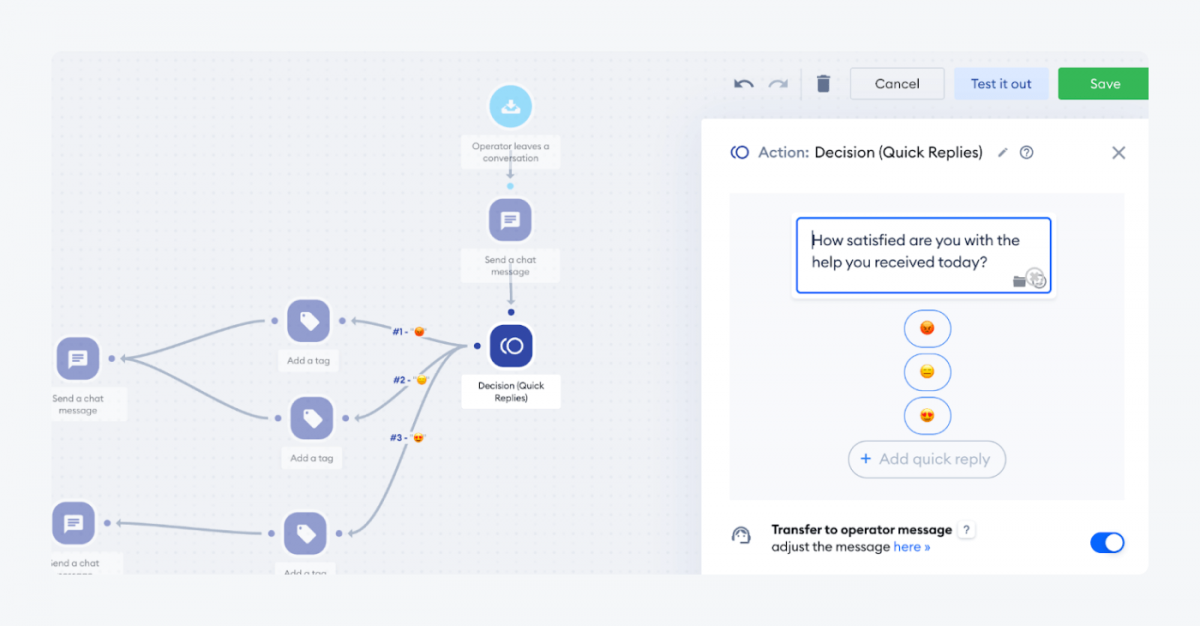
No one will rate the effectiveness of your chatbot efforts better than your visitors and customers. The best thing you can do? Let the chatbots send an automatic customer satisfaction survey, asking the users whether they are satisfied with the chatbot interaction. Based on the results, you can see what works and where the areas for improvement are.
Source: Tidio
Step 8: Monitor chatbot analytics to improve it
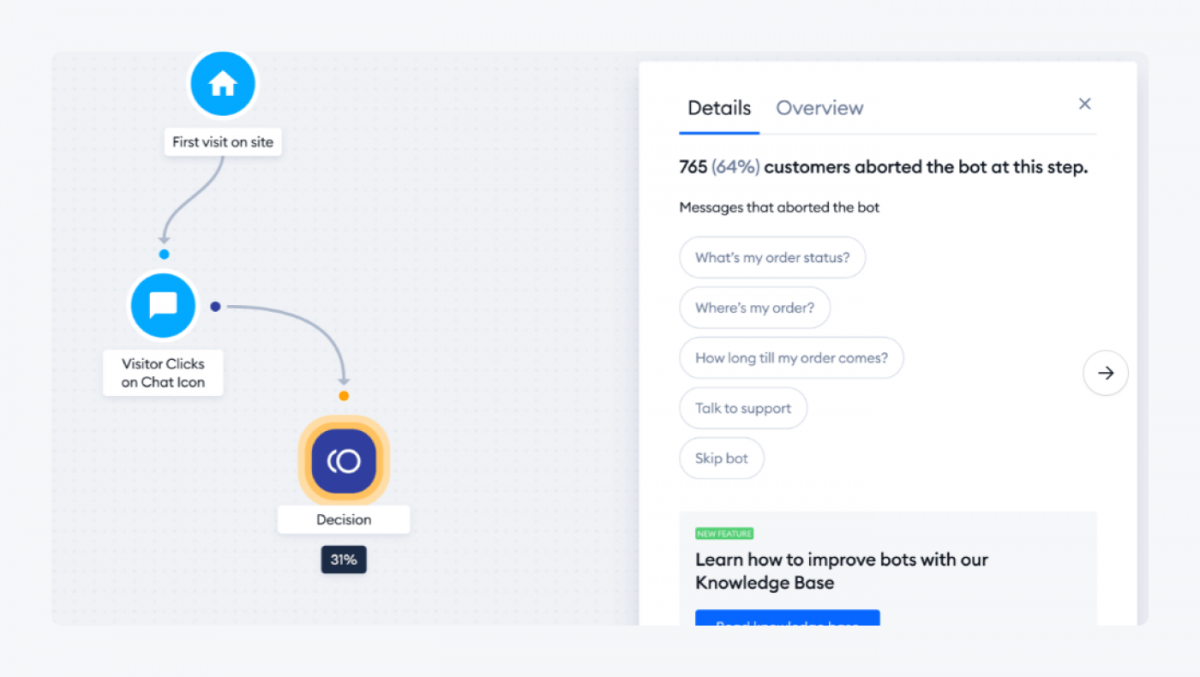
Last, but not least, commit to monitoring your chatbot activity. This will give you the chance to spot types of chatbots that don’t provide the best customer experience and don’t work for your visitors. To make it easier, Tidio lets you monitor the drop-off rate at specific message nodes:
Source: Tidio
Source: YouTube
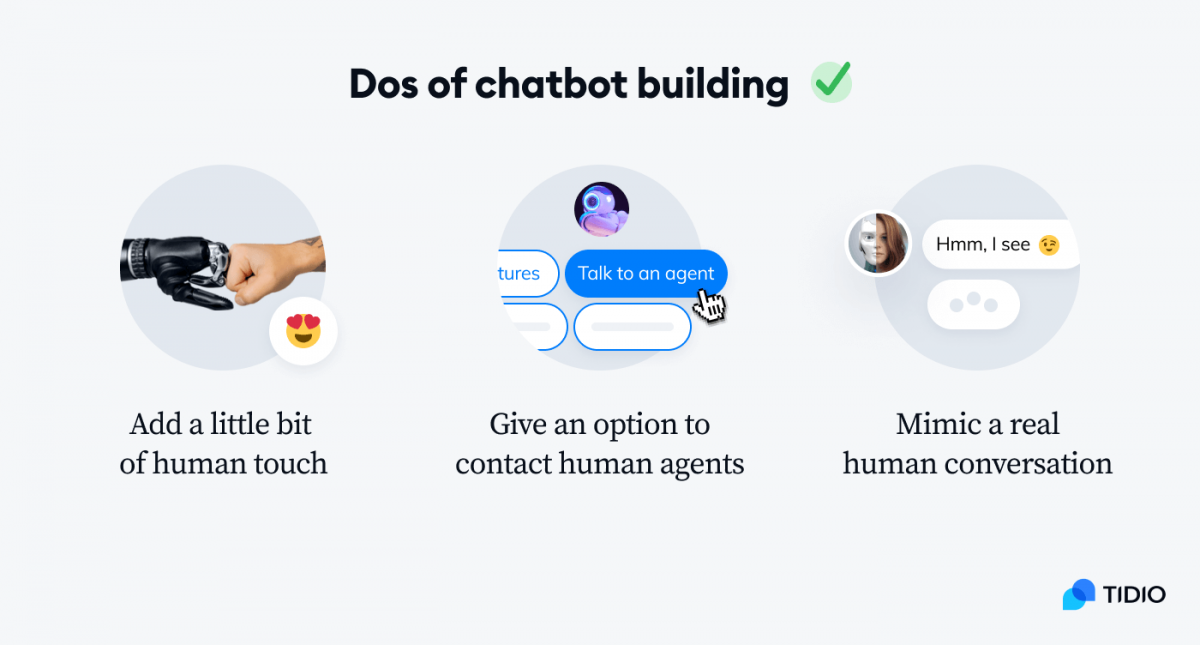
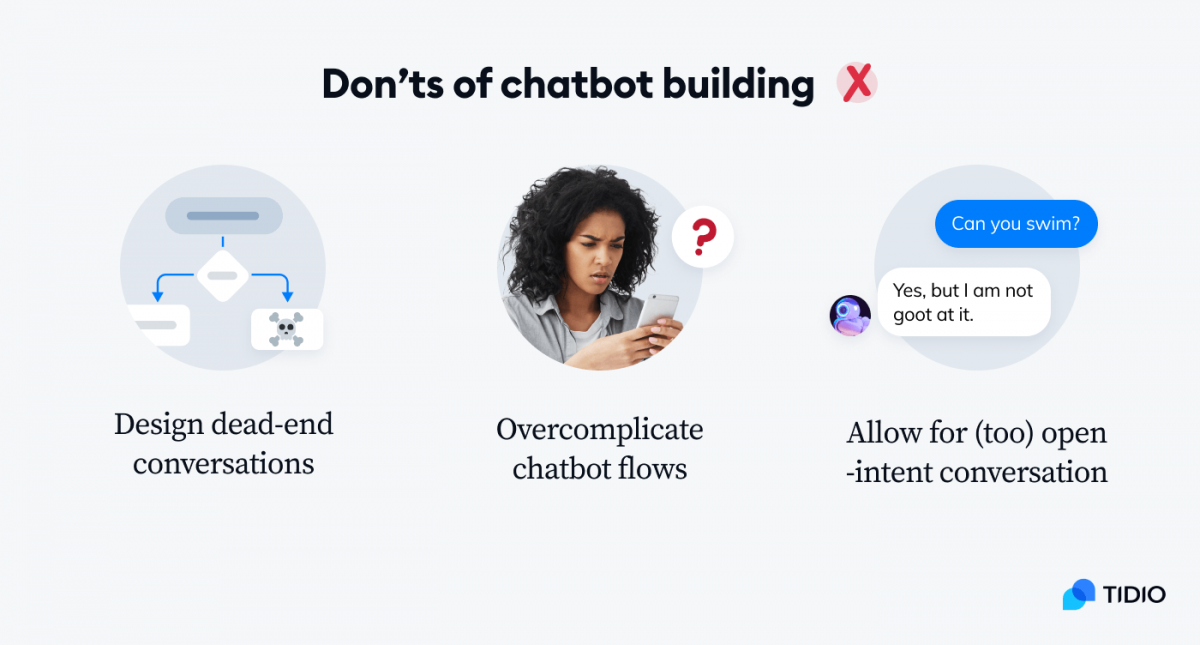
Dos and don’ts of building a chatbot
Now you know what the workflow of building chatbots looks like. But before you open the bot builder, have a look at these handy tips.
Source: Tidio
Source: Tidio
Key Takeaways On How To Make an AI Chatbot.
Building an AI chatbot, or even a simple conversational bot, may seem like a complex process. But if you believe that your users will benefit from it, you should definitely give it a try.
You can create a prototype all by yourself with a bot builder and add it to your business website.
To create your own chatbot:
- Identify your business goals and customer needs
- Choose a chatbot builder that you can use on your desired channels
- Design your bot conversation flow by using the right nodes
- Test your chatbot and collect messages to get more insights
- Use data and feedback from customers to train your bot
- Check which conversation routes are the most popular and improve them for a better user experience
Collect more data and monitor messages to see what are the most common questions. If your customers will be using it on a regular basis, you may think about additional automations.
Apart from being the most popular editor among visual chatbot builders, Tidio also offers a live chat widget and email marketing tools. You can seamlessly integrate your bots with customer support chats and newsletters.
